kruizing with kikukat
Showing posts with label mochi. Show all posts

Monday, March 26, 2018

Mochi Balls

Spring break is just about over.  It's been quite cold and damp, but something tells me it is like this most every year.  This year just seems a lot colder than previous years.  I spent most of my break wearing socks in the house.

This break was not without some fun.  I went out with two friends.  One of them lives here, but our schedules are usually out of sync, so breaks are the only time we can have lunch.  And I was honored he chose to spend his only free lunch in Hilo with me. 

My other friend outing was a nice breakfast with Dee.  Dee lives on another island, but she came home to spend some time with her mother.  Dee usually makes a quick stop to see me when she is back, but it was really nice to sit down with her and catch up.  I guess she has forgiven me for nearly hosting her demise, although I maintain my innocence since things were beyond my control (While taking a shower at my apartment, she slipped and fell.  That same evening, she got a reaction from gulf rock shrimp which we had for dinner.).  And in case anyone is wondering, I ate the same shrimp and did not have any reaction.  Shit, maybe I shouldn't have brought it up again.

The other fun event of my break was getting together with a few friends.  One of my friends brought back a bottle of sake from her recent trip to Japan and wanted to share it.  Since she was sharing sake, I decided to make a few things to nibble on (I cannot drink without having snacks).  Everyone must have been thinking the same thing because we ended up with tons of food. 

The Keeper brought a tray of baked salmon, which I hope to replicate when D1 comes home.  We also had Indian food, Vietnamese food, and a lovely local goat cheese with herbs.  I made a cheesecake in the Instant Pot because one of my friends was intrigued by the idea.  I wanted her to taste it for herself . 

Since sake was one of the reasons for us getting together, I thought a Japanese-ish dessert would be a good match.  My first thought was to make andagi since I was already planning to deep fry won ton.  Nakaz had been experimenting with andagi the previous week, so andagi was fresh in my mind.  And then I remembered fried mochi balls.

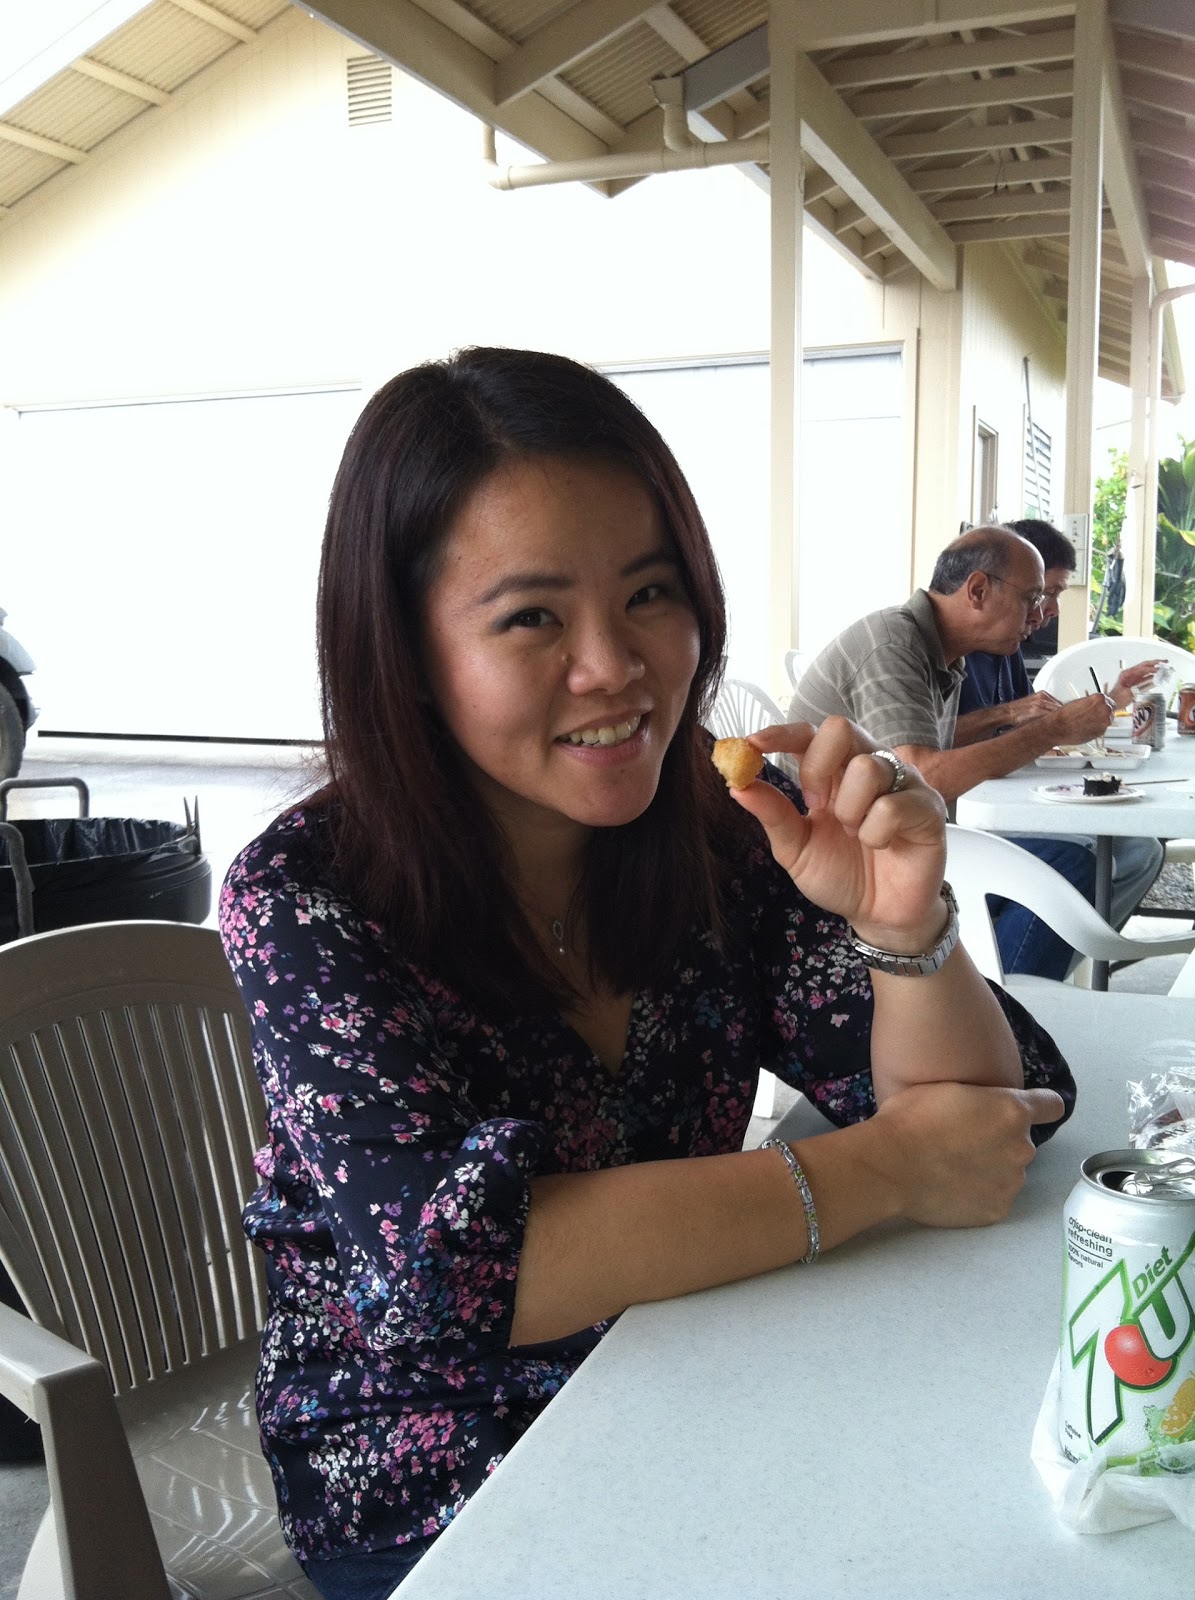
Fried mochi balls look like andagi, but because they are made with mochiko (glutinous rice flour), they are dense and chewy instead of cake-like.  The stiff dough contains a moderate amount of sugar, so there is no need to roll the fried balls in additional sugar.  These mochi balls are similar to cascaron (Filipino fried mochi, often served in multiples on skewers), but they are crispy on the outside.  Unlike other deep fried foods, these mochi balls stay crispy for a long time.  It turned out to be a good choice.  At the end of the evening, the mochi balls were still crispy.

 click on recipe title for printable recipe

     2 c mochiko
     3/4 c sugar
     1 1/2 tsp baking powder
     1/2 tsp salt
     3/4 c water
     oil for deep frying

Mix together.  Using a #70 disher (about 2 tsp), drop dough into hot oil.  Fry until golden brown.  Drain on paper towels.


Monday, January 4, 2016

Shiro An

Happy 2016!  Happy new year!  I got a little distracted with updating this post, hence the late posting.  It's been a hell of a break!

I am still recovering from the holiday party season.  Having two holidays a week apart is brutal.  My family doesn't do much for Christmas, but it is still a monumental task to get the decorations put away.

The best part of the holiday season usually comes after Christmas when my cousins come to town.  This year, three of them made it to Hilo.  I had them over for a cozy NYE dinner.  I made prime rib, roasted garlic crab, garlic noodles, and caprese tomatoes.  I've included links to the Rasa Malaysia recipes (crab and noodles), but the noodle recipe is actually different from the one I use.  If you follow the Rasa Malaysia thread, the garlic noodle recipe was originally posted years ago.  Since then, the recipe has been re-tooled.  I use the original recipe from years ago.  I have not tried the new recipe (with the Maggi seasoning), so I don't know how it compares.  I didn't have time to check on a link to the original recipe.  And really. . .the original recipe was kick-ass, so I'm not sure why it needed to be changed.

For NYE dessert, I served amaretto custard bread pudding.  My cousin brought a Hawaiian Pie Company strawberry guava pie.  Both were delicious.

The Help was thrilled with the bottles of RedBreast and Laphroaig brought over from Oahu.  I am definitely not a fan of whiskey, but I cannot help thinking they'd taste awfully good in some kind of dessert.  Maybe when he is not looking. . .

Although the food and drink were fabulous, the best part was being able to just sit and hang with the cousins, something you cannot do at a restaurant.  My cousins are all so awesome, and we don't always have the luxury of being in one place all together.  They had a rough start to 2015, so I'm hoping 2016 will be a better year for them, despite the fact that Kikukat Dad is hounding them to go to Japan with him again.  I know, I know. . .I will owe them big time for the travel-sitting.

The second half of the school year begins tomorrow (for teachers...begins on Wednesday for many students).  Glad I got my grades and pacing guide done before I left for vacation.  I'm the lazy type who doesn't like to work, but there are a bunch of people I work with whom I adore, and it will be nice to see them again.

What I am NOT looking forward to is D1's departure in a few days.  Gotta brace myself for that.  Even though she drove me crazy at times (and cost me over $200 to replace a car key she "misplaced". . .wtf, can make dean's list but cannot keep track of a car key), it was really nice having her home.  Even Shaka is now saying her name!

Since I'm trying to stretch out the holiday season (since it means D1 is still here), I'm going to continue last week's recipe, which was microwave daifuku mochi.  While a variety of fillings can be used, including the ever-convenient pre-made koshian and tsubushian (comes in cans of plastic bags), my filling of choice is shiro-an, shiro meaning "white" in Japanese.

click on recipe title for printable recipe

     1 lb lima beans (dried)
     2 c sugar
     dash of salt

Soak beans overnight in water to cover.  Slip skins off before cooking.  Place beans in pot with water to cover and cook until soft.  Add sugar and salt and cook until mixture is almost dry and forms a ball, about 30 minutes, stirring constantly.  When cooking, add as little water as possible - if there is too much water, it takes much longer to cook to the stiff stage.  Yield:  50 "an" balls (using a #60 disher).

Monday, December 28, 2015

Microwave Daifuku Mochi

So I guess I survived Christmas.  Now onto the New Year festivities.

Last year for CAE's party, I made a tray of daifuku mochi.  The old aunties were so impressed.  They actually thought I purchased the mochi.  Hahahaha.  Now that I think about it, I could've even made this in my classroom and taken it out in time for the potluck (the faculty potluck, just before break began).

Since New Years will be here soon, and you might find yourself with nothing to bring to a party, here is a short tutorial for making daifuku mochi using the convenience of a microwave.

Pour filling into greased microwave tube pan.  Cover with plastic wrap, and cook according to recipe instructions.

Sprinkle work surface and mochi surface with potato starch.

Using a plastic knife, cut hot mochi into 12 pieces.

Use fingers to flatten mochi to 1/8-1/4" thickness.

Place filling onto center of flattened mochi.

Fold mochi around filling.

Pinch mochi edges to seal in filling.

 click on recipe title for printable recipe


     1 1/2 c mochiko
     1/2 c sugar
     1 1/2 c water
     food coloring, if desired
     filling, such as sweet bean paste (smooth, chunky, white or black), sweetened peanut butter, or
          brownie chunk

Grease a microwave tube pan.  Combine mochiko, sugar, water, and food coloring.  Pour into greased tube pan.  Cover loosely with plastic wrap.  Microwave on high for 5 minutes.  Microwave on 50% power for 3 minutes.  Turn out onto surface covered with potato starch.  Sprinkle potato starch on mochi.  Cut into 12 pieces.  Flatten and fill with desired filling.  A #60 disher works well for portioning out the filling.


Monday, March 17, 2014

Easy Mochi Rice

Happy St. Paddy's Day!

Spring Break is finally here!

I'm headed to Honolulu today to take D1 to see an allergist.  This is a much-anticipated visit, as we first attempted to see an allergist over 3 months ago, albeit a different one in Kona.  Thanks to my medical insurance, part of our trip will be subsidized since we had problems getting an appointment with the allergist in Kona.

This whole allergy thing is quite bothersome.  Nobody in my family is really allergic to anything (one minor test said I was allergic to melon, but I'm not quite certain how much I believe that) except D1.  D1 is already allergic to penicillin.  We'll find out today if we need to add to that list.  Shit.  I'm feeling bad for her already.  She knows what seafood tastes like, and she loves it.  NN (soccer mom from a few posts ago) told me she has a wicked shellfish allergy.  It began with itching when she was a kid, and by the time she was in high school, the severity of symptoms progressed from itching to her throat closing.  Yikes!  Kikukat Mom cannot eat fresh scallops, but she is able to eat the really expensive dried scallops sold in Chinatown. Is this considered a true allergy?

Before I left work for vacation, I made sure to input my 3rd quarter grades.  Not too many Fs...mostly As and Bs.  The Fs were definitely appropriate...absences affecting grades, work not turned in, class too difficult (perhaps).  It amazes me how students can be told they are failing at midquarter yet they do nothing to change their habits.  Anyway, I didn't want the grades hanging over me while I shop in Honolulu, so it was imperative that I get them done.  I also tried to do all of my copying for the remainder of the year.  We will be reading Romeo and Juliet and Lord of the Flies during the 4th quarter, and I need to be sure we have plenty of activities so the students can truly make meaning from the text.

Inputting grades was not the last work-related thing I did before embarking on vacation.  The senior prom was on Friday night, and being the good soldier that I am, I agreed to chaperone (actually I was afraid to say no to 3M since I already begged out of chaperoning the winter ball).  Students sure go all-out for the night!  The girls were dressed in beautiful gowns, mostly floor-length.  Most of the boys wore tuxedos.  Nice to see the kids enjoying themselves.  Nice to see them all cleaned up too.

Although we are going to Honolulu for medical reasons, D2 is tagging along.  She says she wants to shop and eat.  Just like her sister.  Just like me.  We each have a list of things we need to buy.  D1 is shopping for a dress for the junior ball at the crosstown rival high school.  D2 wants slippers and clothes.  I want to add to my Manuheali`i collection.  Both Ds have requested we dine at Legend Seafood (yes, I know!!!) Restaurant.  They both love the beef broccoli pan fried noodle (contains no seafood other than oyster sauce...my guess).

I'm looking forward to grabbing a few items from the dim sum carts.  My mouth is watering just thinking about the fried taro, scallion cake and look fun.  Let's also not forget about the mango pudding there.  I haven't had mango pudding in ages!  Legend also makes really good mochi rice.  You can get it wrapped in lotus leaf (joong), but they also have it packed into see-thru bowls.  While I've made both, the latter type is much simpler to make at home. 

click on recipe title for printable recipe

     1 c mochi rice (glutinous rice)
     1 c regular rice (Calrose)
     1 lb assorted cooked toppings*
     1 tbsp minced dried topping**
     1 can mushroom stems & pieces (do not drain)
     1 can chicken broth
     water

Combine mochi rice and regular rice.  Rinse well.  Cover with water and soak for 1 hour.  Drain well and place in rice cooker.  Empty entire can of mushroom stems & pieces over rice.  Add assorted cooked toppings.  Pour chicken broth into 2-cup measuring cup and add enough water to make 2 cups.  Pour into rice cooker.  Cook rice as usual.  When rice is done, stir well before serving.

*assorted cooked toppings:  any combination of the following:  steamed lup cheong, BBQ pork cubes, roast pork cubes, roast chicken cubes. 

**dried topping:  dried shrimp or dried scallops

Monday, March 3, 2014

Happy Girls' Day: Hishi Mochi

Happy Girls Day!!

Today is a day of celebration for girls!

I contemplated what to buy myself for Girls Day, but I pretty much buy what I want anyway, so there was really nothing I HAD to have.  It would've been nice to take a day off, and I seriously considered it, especially since I have my worst class today.

I cannot wait until the school year is over and my time with one of my classes is behind me.  A bunch of them will be very sorry when they get into the real world.  This is the class with a few who come in and ask, "what, we gotta do work today?"  Not a day in the school year has gone by where they did not do work, so I'm not sure why a one guy, "Charlie", keeps asking.  Charlie wanted me to curtail all assignments for the week of his birthday AND bring in a cake for him.  Get real!

Half of the class will be enrolling in institutions of higher learning after graduation, and I have faith they will do well.  

Sadly, the other half of the class have no realistic plans for anything.  They say they want to work, but who will hire them?  I certainly wouldn't.  And should they get hired, their variable school performance and lingering sour attitudes have not inspired thoughts of long-term employment.  They do not see the parallel between hard work in school and working hard in an employment setting. 

Anyway, my conscience got the better of me and I went to work. In spite of having to deal with the ups and downs as they pass through adolescence, I do enjoy teaching them.  Since they are boys, they may be oblivious to any Girls Day traditions. . .not sure how many of the student population even know it's Girls Day.   That's not how they roll.

Realizing that I have girls of my own, I made sure to have something for them.  D1, the pickiest of the picky, got a gift card.  No point in trying to pick something she'd like.  D2 is slowly morphing into her sister, so she also got a gift card.  Now they can buy what they want.

In addition to the gift cards, I made hishi mochi for them.  I don't know how much they consumed (probably just a piece), but both of them wanted to take some to school to share with teachers/friends.  Knowing this, I made 2 pans. . .so the 3 of us could eat and share!

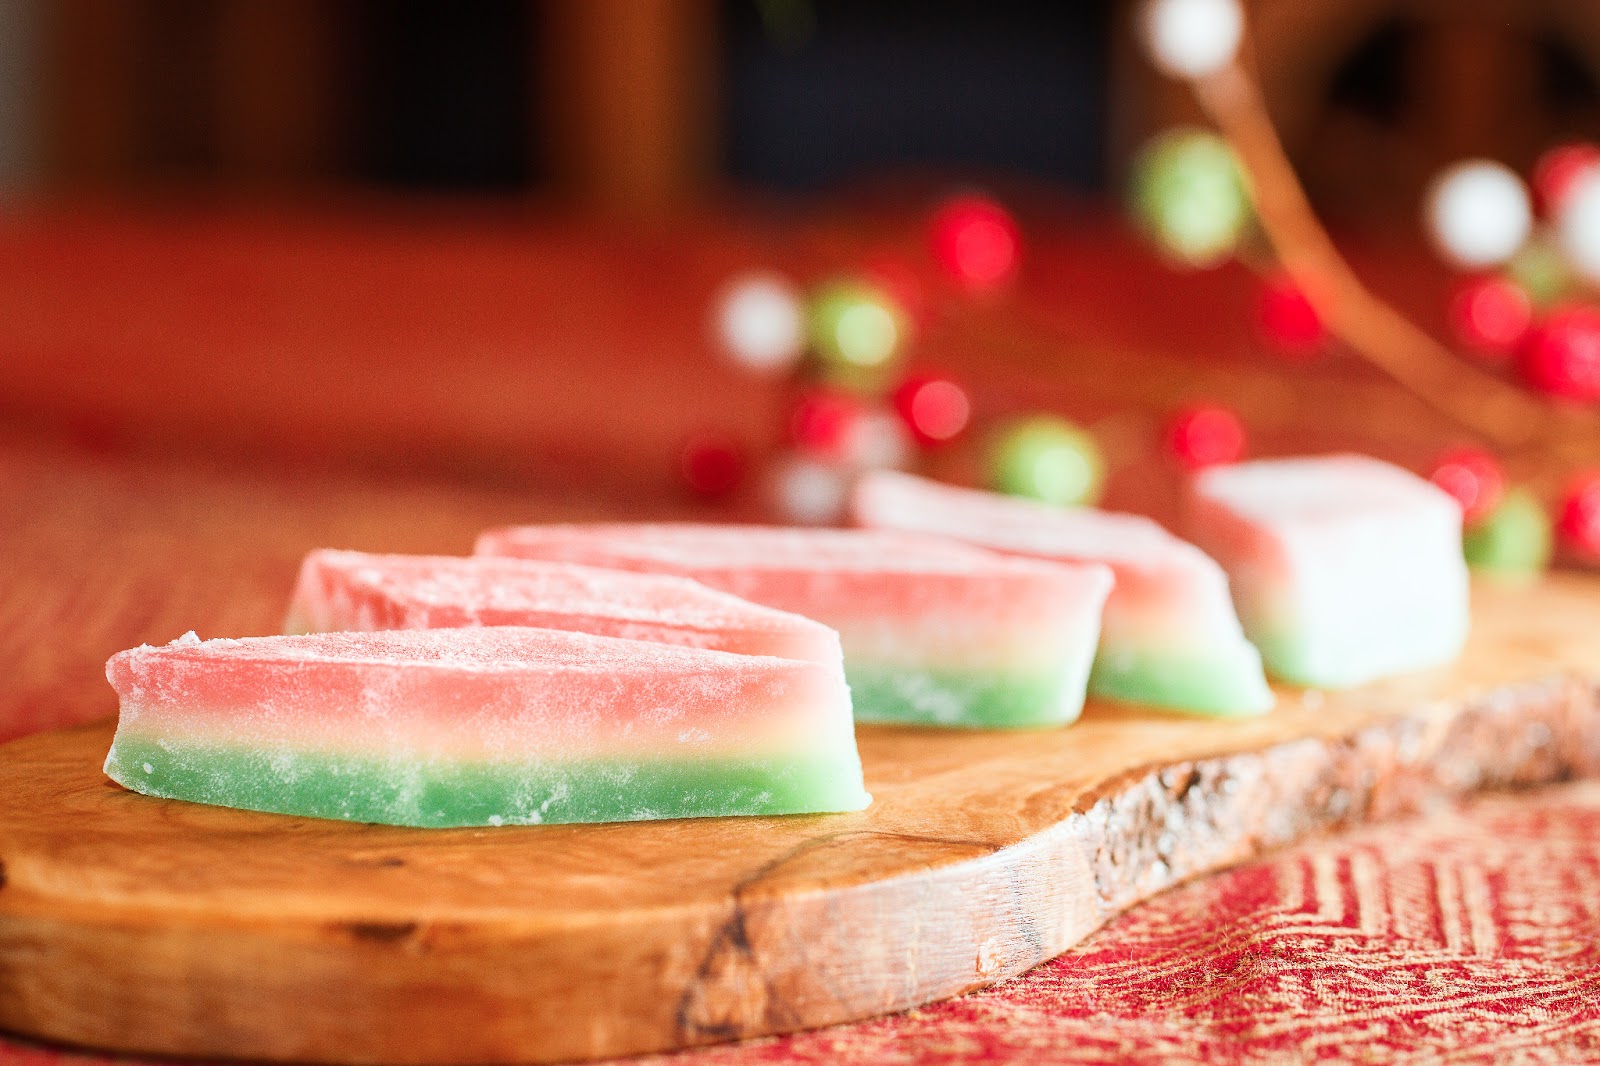
In April '12, I blogged about the significance of the colors.  I also included a recipe for making a thick version of chichi dango, which can easily be made into hishi mochi.  When it is made in specific colors (pink, white & green) and cut in a specific way (diamond shapes), it takes on a different name:  hishi mochi.  This week's hishi mochi recipe is for narrow layers and uses just 1 pound of mochiko.  For many people, it's easier to eat this thin style rather than the thick version.  I like them both, but since I planned to give some away, I decided to stick with the thin style.  If you are lazy or just have no dog in the fight, you can cut the mochi into square or oblong shapes. . .it's trickier to get the diamond shape just right.

click on recipe title for printable recipe
Hishi Mochi
(3-layered, diamond-shaped chichi dango)

     1 box (1 lb) mochiko
     2 c sugar
     1 tsp vanilla
     1 can coconut milk
     water
     food coloring (2 different colors)

Grease a 9 x 13" baking pan.  Be sure to grease far up the sides too.  Preheat oven to 350 degrees.  Combine mochiko and sugar in a large bowl.  In a 1 quart measuring cup, empty coconut milk.  Add enough water to make 3 1/2 cups of liquid.  Add vanilla.  Add liquid to dry ingredients.  Remove 2 cups of batter to a small bowl.  Add green food coloring.  Pour into prepared pan.  Cover tightly with foil.  Bake for 15 minutes.  While green layer is baking, remove an additional 2 cups of batter to a small bowl.  Add red food coloring.  Set aside.  When green layer is done, remove foil and pour white (uncolored) batter evenly over green layer.  Cover tightly with foil and bake for 20 minutes.  When white layer is done, remove foil and pour pink batter evenly over white layer.  Cover tightly with foil and bake for 30 minutes.  Remove from oven and remove foil.  Cover with a dishcloth or place under food net.  Allow to cool at least 10 hours before cutting.

Saturday night was Endless Twilight, the junior prom.  D1 and her friends spent the afternoon getting ready for the big night.  Before they headed out, The Help snapped a few pics.
Click to play this Smilebox collage
Create your own collage - Powered by Smilebox
A free digital collage by Smilebox

Monday, June 18, 2012

Joong Practice


Today's post is in honor of the upcoming Dragon Boat Festival (June 23 or so, 5th day of the 5th lunar month).  I hope you will be fortunate enough to enjoy joong.

When I lived in Honolulu and went to Chinatown on the Saturdays to buy snacks, I would often buy a joong from the pastry shop.  It was also a frequent selection from the steam cart on occasions for dim sum.  On my last trip to Honolulu, I went to my favorite pastry shop (since resurrected in a similar storefront), Sing Cheong Yuan, to buy some macadamia nut candy to bring home for "moonyagi" (bastardized version of "omiyage", courtesy of my Portuguese-Italian friend in Kihei).  In addition to the box of macadamia nut candy blocks, and a baggie of li hing bittermelon (for Mom and Dad), I left with a longing to eat joong.  The shop had several varieties of joong sitting on the pastry case, and I was so tempted to buy the pork-egg joong.  Practicality got the better of me, and I left empty handed, but not without a cause. . .I would make my own joong.

I already had a jar full of salted eggs, so all I needed to buy was a few things and look for some help with seasoning.  Seemed simple, and the gathering of the ingredients was the easy part, especially when I opted to use ti leaves (instead of bamboo leaves) to wrap the joong.

Call me what you will, but my idea of joong uses black-eyed peas instead of mung beans.  I also added lup cheong for additional flavor.

mochi rice and black eyed peas (soaked overnight)
seasoned pork belly
raw salted egg yolks
sliced lup cheong
mise en place ingredients
joong composition:  rice, pork, yolk, lup cheong, rice.  Popo Wu in Taiwan adds a chestnut too.
wrapping joong
tying joong
boiling joong


Joong is ready!
 I tested out my joong with D1's friend Ashley, whose family hails from Taiwan.  Ashley does not say "joong" the way those of us who grew up in Hawaii say it.  In fact, her dad referred to is as "tzongshe", which sounds like something I can't even spell.  I made Ashley repeat it over and over, yet I still cannot say it.  In spite of my shortcomings in pronounciation, Ashley and her parents said they loved it.  They said it tasted very similar to what her Popo in Taiwan would make around the time of the dragon boat races (5th day of the 5th lunar month).  I took it as a compliment. 
 click on recipe title for printable recipe
Joong

     2 lbs mochi rice
     4 tbsp (scant)  rock salt, divided per recipe directions
     1/2 c black eyed peas
     10 salted duck/chicken egg yolks, raw
     1 lb pork belly
     2 lup cheong, each sliced diagonally into 5 pieces
     1 1/2 tsp 5-spice
     20 ti leaves, cleaned and de-ribbed
     string to tie

Begin the night before by washing mochi rice.  Add water to cover and add 2 tbsp rock salt to the water.  Rinse black eyed peas and add to mochi rice.  Let soak overnight.  Cut pork into 10 pieces.  Season with 5-spice and remaining 1 1/2 tbsp salt.  Chill overnight.

The next day, heat a large pot of boiling water.  Roll 2 ti leaves into a cylinder and plunge into boiling water.  Lay flat.  Repeat with remainder of ti leaves.  Drain rice/bean mixture.  Arrange all ingredients.  Take 2 ti leaves and overlap them with a 2" stagger.  Fold in half to form a corner.  Place 1/2 c rice/bean mixture into corner.  Place 1 yolk, 1 piece pork, and 1 slice lup cheong onto rice.  Cover with another 1/2 c rice/bean mixture.  Fold ti leaves to completely encase rice and filling so a 4-sided pyramid is formed (3 faces and a base).  Use string to tie bundle securely.  Place joongs in a large pot.  Cover with water.  Add 1 tsp rock salt, and bring to a boil.  Lower heat to simmer and cook for 3 hours.  Remove joong from pot and place on a rack to drain.  Serve immediately, chill, or freeze.  Leftovers may be reheated in the microwave.


I was busy last week, catching up with friends.  I had lunch with Edz on Wednesday and Brucie on Thursday.  Edz leaves on Thursday for the City of Brotherly Love, and Brucie will be on his way to the Forbidden City soon.  I wish both of them safe travels.
Brucie!
This week should be interesting...I'm lunching with the Rents today (belated Mother's/Father's Day celebration),  brunching with A tomorrow, and going into the office again on Wednesday.  I wish I could escape work.  I think I will try and make this the last day of work for a while.  I need my summer.

Monday, April 30, 2012

Thick Three Layer Chichi Dango

Chichi dango used to be something humbug to make.  It was traditionally prepared by steaming over hot water then cooled and cut into pieces.  At least that's what I remember from small kid time.  But sometime before I graduated from high school, baked chichi dango was introduced.  Baking was a way to nearly replicate steamed chichi dango with less effort, provided one had patience to wait at least ten hours for the pan to COMPLETELY COOL.

I often make chichi dango for Japanese occasions:  Girls Day (3-3), Boys Day (5-5), New Years Day (1-1).  I also bring it to pot luck gatherings.  I have go-to recipes, which I'm sure most people in Hawaii have.  The most common chichi dango is dyed pink.  These are sold in most supermarkets, and they come individually wrapped in paper.  If you are lucky enough to live in Honolulu, you can get a super cute friend to take you to the factory where its made.  They will hand-pack a box for you.

For special occasions, I like to make layered chichi dango.  I've recently discovered the "thick" style which is double the height of most baked chichi dango creations.  The fun part of layered chichi dango is varying the colors.  The traditional layered colors are green, white and pink, which are said to represent the seasons of winter, spring, and summer (no autumn because metaphorically, a girls life should have no autumn).  No, I didn't make that up.  I read that somewhere.  For looks, I prefer pink, white and yellow (as in the pictures).  I don't think blue chichi dango looks very appetizing, so I suppose a green-white-green or white-green-white combination could be done for Boys Day.

The chichi dango in the pics were colored with gel coloring.  Don't be afraid to be bold with the colors, as they will get somewhat washed out in the batter.  If you have made baked layer-type chichi dango before, you were probably instructed to cover the pan tightly with foil when baking each layer.  When I did that the first time, the chichi dango didn't cook properly, so please follow the directions carefully, covering with foil only after pouring the final layer.

Another mistake some people make is to rush the cooling process.  Please don't.  The best rule to follow is to cool the pan overnight.  If cut too early, the chichi dango will be very soft and will have a tendency to weep faster.

teflon knife


The best thing to use to cut the chichi dango is a teflon knife.  The plastic knife from McDonalds will also work.  Sprinkle potato starch as you are working to keep the chichi dango from sticking to itself.

For Girls Day, I gave the nice ladies in the office a little container of chichi dango.  They do so much for us so I wanted to show my appreciation.  I don't think anyone else gave them anything.  Real sad.  Real shame.  The bosses treated the clerical staff in the office to an office professionals day prime rib luncheon buffet, and they did not solicit donations from any of the other drones.  Yay!

Tomorrow marks the beginning of May, and we seem to be hitting the travel season.  D2 leaves tomorrow for a 3-night excursion to Kauai and Oahu with her class (bless you, Mrs. Ferreira, you are the best), and the Rents leave for the far east in a week.  The next "regular" post to this blog will be on May 15.  I am also hitting the road and will be updating as adventures unfold.  Stay tuned. . .   


 click on recipe title for printable recipe
Thick Three Layer Chichi Dango

     2 lbs mochiko
     4 c sugar
     4 c water
     2 cans (13.5 oz each) coconut milk
     food coloring
     potato starch

Preheat oven to 350 degrees.  Grease a 9 x 13" pan.  Combine mochiko, sugar, water, and coconut milk with a whisk.  Remove 4 cups of batter and tint with food coloring (or don't tint if you want an all-white layer).  Bake for 15 minutes.  While first layer is baking, remove 4 cups of batter and set aside.  To remaining batter, add food coloring if desired (or don't add if you want an all-white layer).  Pour over 1st layer and bake 25 minutes.  Add food coloring to batter set aside (or don't add if you want an all-white layer).  Pour over 2nd layer.  Cover pan tightly with foil and bake for 1 hour.  Remove foil immediately.  Cool completely before slicing with plastic or teflon knife.

Monday, January 30, 2012

Kinako Puffs

Kinako Puff Addict
We've been eating a lot of mochi stuff (mt. view gramma's kinako mochi, zensai, kinako puffs, zenzai), and there doesn't seem to be any end in sight.  With New Years (Japanese, Chinese, and everything else in between) behind us, we're now knocking on the door of the next mochi-eating day, Girls Day. No doubt, the Ds will be expecting some kind of cutesy gift.  I'd better start planning now.

This week began with lots of feasting.  The High Commander (HC) treated all of us drones to Chinese food for lunch on Monday.  That lady is generous and treats employees very well.  Too bad others cannot seem to learn from her.  And its not like they aren't stuffing their faces with food either!  Pity.

On Thursday, I experienced something I hope I never need to experience again. . .my computer crashed.  I have a virus to thank for this.  I spent Thursday night and most of this weekend trying to restore my computer to pre-sickness status.  Luckily, I invested $ in a LaCie Rikiki 1 TB hard drive which was set to backup weekly (I do it daily now!).  Unfortunately, I lost access to Adobe Photoshop Elements and all the keyword tags.  So while I could easily upload all my pics, I had to re-install Adobe and am now in the painstaking process of tagging all of my pics again.  But now, I'm also backing up my Adobe catalog (and all the keyword tags) to my Rugged drive; so if I have another crash, I should be able to restore my catalog when I re-install Adobe Photoshop Elements.  Oh, and I also bought a 1-year subscription to Avest! antivirus software.  Sore lesson!

The high point of my week was going to Honolulu for a day (Friday) to attend a training with the Attorney General's office.  Learned some rather interesting things, along with some things I wish I didn't hear, and some things which fit BOTH of those categories.  I was lucky enough to enjoy a meal at Goma Tei, and I picked up a trinket for the HC.  While I was at Honolulu International Airport waiting for my return flight, I learned that I'll be hosting 2 high school students from Nagano, Japan.  They will spend a few days in Hilo with a some classmates and a teacher.  Its not clear to me yet WHY they are coming, but what is clear, crystal clear, is that they will arrive on Monday, FEBRUARY 6!!!  I need to start cleaning my house soon.  Cripes!!!

I was kinda naughty this weekend.  On Saturday, I told Mr. Dependable to take D2 to a birthday party.  Well, when he got there, nobody was there.  I checked the invitation and text message and realized the party is this coming weekend.  Oops!  But last night, I was really, really naughty, and I will likely pay royally later.  It was a moment of weakness, and I needed something to make myself feel better.  No, I didn't have a bad day.  No, I, I, umm, ohhh. . .

I never got around to telling you what I contributed to CAE's New Years Day party.  This year, I was told to bring:
fried ginger chicken wings
pumpkin crunch cake
apricot-pineapple-mac nut bars
I planned really well so the desserts were made the night before.  I got up early and fried the chicken in the largest cast iron skillet I could find.  I was done early and was feeling rather ambitious, so I decided to make kinako puffs.

kinako puffs


Kinako puffs are tiny, slightly sweet, deep-fried balls made with mochiko and kinako (soy bean flour).  Use a tiny disher to scoop the batter into the hot oil.  I think I used a #70. . .using #50 resulted in larger puffs which did not cook properly.  Because the mochiko is specified by weight, it might be helpful to have a kitchen scale to weigh the mochiko, unless you live in Hawaii, where mochiko is also available in 10 oz. bags (in addition to the 1-pound box).  I may have read somewhere that 10 oz. mochiko is equivalent to 2 cups, but I'm not totally sure.  I do know that the 1 lb. box contains MORE than 3 cups (but less than 4 cups).

LA, a.k.a., kinako puff addict, couldn't stop eating them.  She said they were so cute and just the right size for popping into her mouth.  I wasn't counting, but every time I looked, she had one in her hand or her mouth. But that's okay because she's been working it all off at Zumba (yes, I saw your pics!).

click on recipe title for printable recipe
Kinako Puffs

     10 oz mochiko
     1 c sugar
     2 tsp baking powder
     1/2 c kinako
     1 tsp salt
     1 1/4 c water
     oil for deep frying

Heat oil to 340 degrees.  In a bowl, combine dry ingredients with a whisk.  Add water and mix.  Use a small disher to scoop tiny balls into hot oil.  Fry until golden brown.  Drain.