kruizing with kikukat
Showing posts with label chichi. Show all posts

Monday, March 3, 2014

Happy Girls' Day: Hishi Mochi

Happy Girls Day!!

Today is a day of celebration for girls!

I contemplated what to buy myself for Girls Day, but I pretty much buy what I want anyway, so there was really nothing I HAD to have.  It would've been nice to take a day off, and I seriously considered it, especially since I have my worst class today.

I cannot wait until the school year is over and my time with one of my classes is behind me.  A bunch of them will be very sorry when they get into the real world.  This is the class with a few who come in and ask, "what, we gotta do work today?"  Not a day in the school year has gone by where they did not do work, so I'm not sure why a one guy, "Charlie", keeps asking.  Charlie wanted me to curtail all assignments for the week of his birthday AND bring in a cake for him.  Get real!

Half of the class will be enrolling in institutions of higher learning after graduation, and I have faith they will do well.  

Sadly, the other half of the class have no realistic plans for anything.  They say they want to work, but who will hire them?  I certainly wouldn't.  And should they get hired, their variable school performance and lingering sour attitudes have not inspired thoughts of long-term employment.  They do not see the parallel between hard work in school and working hard in an employment setting. 

Anyway, my conscience got the better of me and I went to work. In spite of having to deal with the ups and downs as they pass through adolescence, I do enjoy teaching them.  Since they are boys, they may be oblivious to any Girls Day traditions. . .not sure how many of the student population even know it's Girls Day.   That's not how they roll.

Realizing that I have girls of my own, I made sure to have something for them.  D1, the pickiest of the picky, got a gift card.  No point in trying to pick something she'd like.  D2 is slowly morphing into her sister, so she also got a gift card.  Now they can buy what they want.

In addition to the gift cards, I made hishi mochi for them.  I don't know how much they consumed (probably just a piece), but both of them wanted to take some to school to share with teachers/friends.  Knowing this, I made 2 pans. . .so the 3 of us could eat and share!

In April '12, I blogged about the significance of the colors.  I also included a recipe for making a thick version of chichi dango, which can easily be made into hishi mochi.  When it is made in specific colors (pink, white & green) and cut in a specific way (diamond shapes), it takes on a different name:  hishi mochi.  This week's hishi mochi recipe is for narrow layers and uses just 1 pound of mochiko.  For many people, it's easier to eat this thin style rather than the thick version.  I like them both, but since I planned to give some away, I decided to stick with the thin style.  If you are lazy or just have no dog in the fight, you can cut the mochi into square or oblong shapes. . .it's trickier to get the diamond shape just right.
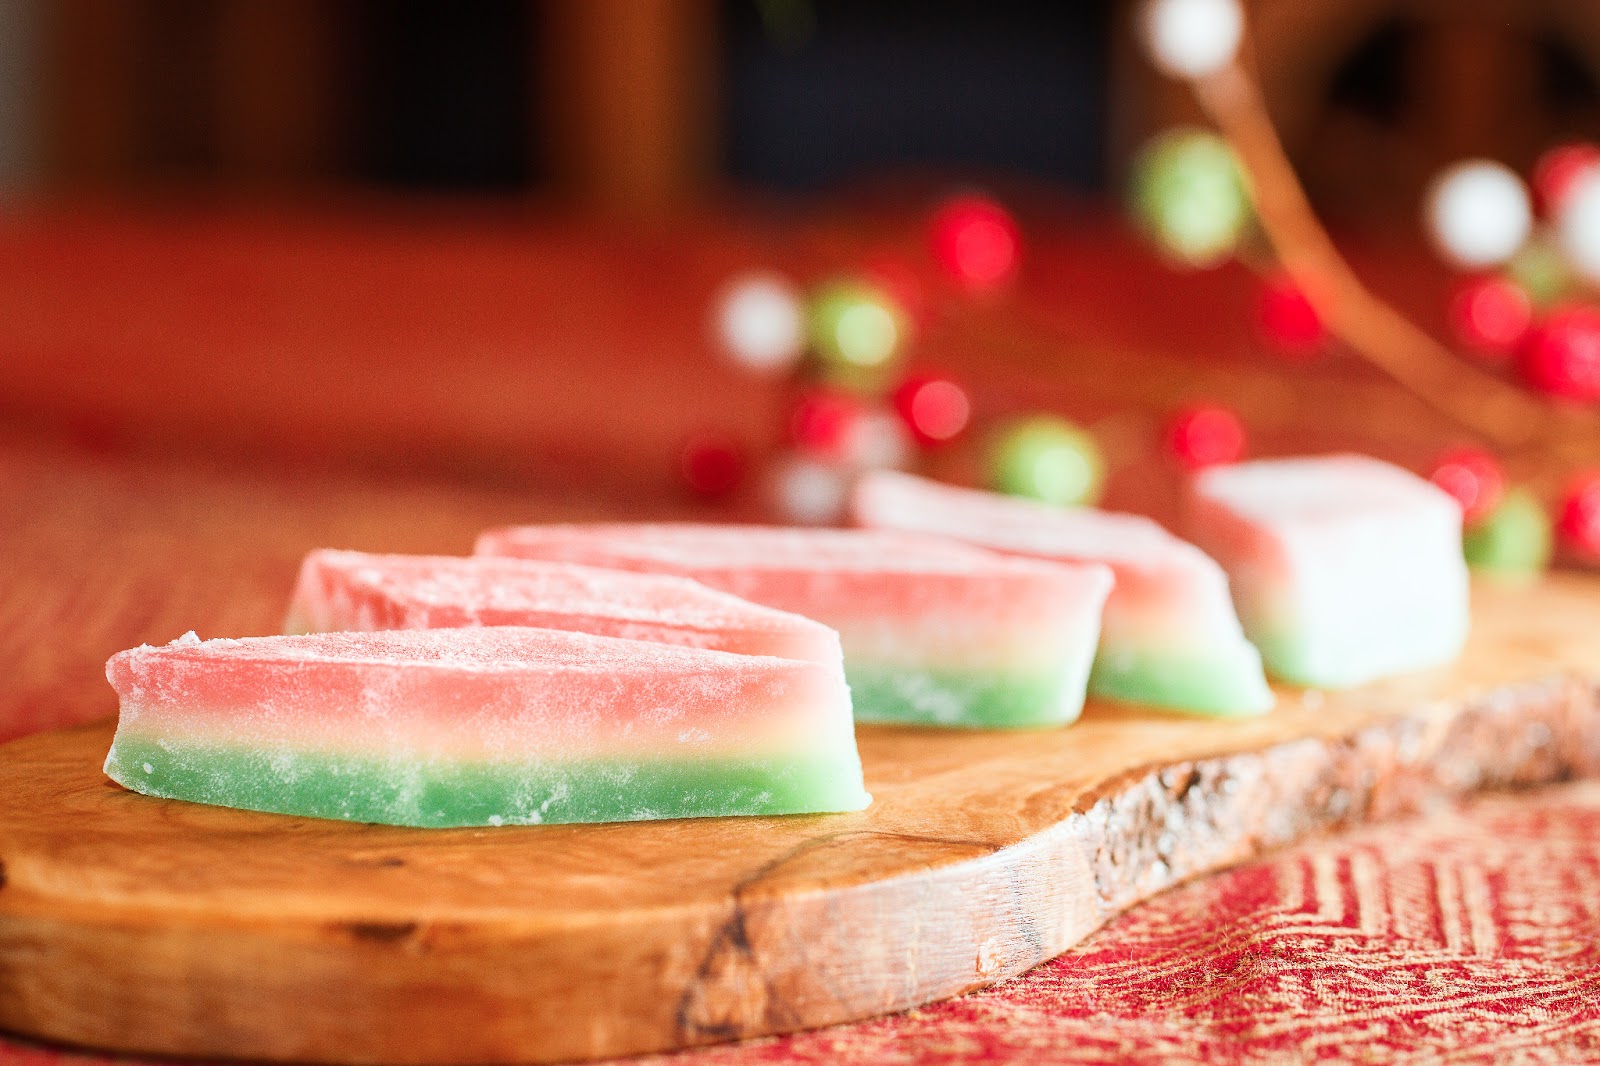
click on recipe title for printable recipe
Hishi Mochi
(3-layered, diamond-shaped chichi dango)

     1 box (1 lb) mochiko
     2 c sugar
     1 tsp vanilla
     1 can coconut milk
     water
     food coloring (2 different colors)

Grease a 9 x 13" baking pan.  Be sure to grease far up the sides too.  Preheat oven to 350 degrees.  Combine mochiko and sugar in a large bowl.  In a 1 quart measuring cup, empty coconut milk.  Add enough water to make 3 1/2 cups of liquid.  Add vanilla.  Add liquid to dry ingredients.  Remove 2 cups of batter to a small bowl.  Add green food coloring.  Pour into prepared pan.  Cover tightly with foil.  Bake for 15 minutes.  While green layer is baking, remove an additional 2 cups of batter to a small bowl.  Add red food coloring.  Set aside.  When green layer is done, remove foil and pour white (uncolored) batter evenly over green layer.  Cover tightly with foil and bake for 20 minutes.  When white layer is done, remove foil and pour pink batter evenly over white layer.  Cover tightly with foil and bake for 30 minutes.  Remove from oven and remove foil.  Cover with a dishcloth or place under food net.  Allow to cool at least 10 hours before cutting.

Saturday night was Endless Twilight, the junior prom.  D1 and her friends spent the afternoon getting ready for the big night.  Before they headed out, The Help snapped a few pics.
Click to play this Smilebox collage
Create your own collage - Powered by Smilebox
A free digital collage by Smilebox

Monday, April 30, 2012

Thick Three Layer Chichi Dango

Chichi dango used to be something humbug to make.  It was traditionally prepared by steaming over hot water then cooled and cut into pieces.  At least that's what I remember from small kid time.  But sometime before I graduated from high school, baked chichi dango was introduced.  Baking was a way to nearly replicate steamed chichi dango with less effort, provided one had patience to wait at least ten hours for the pan to COMPLETELY COOL.

I often make chichi dango for Japanese occasions:  Girls Day (3-3), Boys Day (5-5), New Years Day (1-1).  I also bring it to pot luck gatherings.  I have go-to recipes, which I'm sure most people in Hawaii have.  The most common chichi dango is dyed pink.  These are sold in most supermarkets, and they come individually wrapped in paper.  If you are lucky enough to live in Honolulu, you can get a super cute friend to take you to the factory where its made.  They will hand-pack a box for you.

For special occasions, I like to make layered chichi dango.  I've recently discovered the "thick" style which is double the height of most baked chichi dango creations.  The fun part of layered chichi dango is varying the colors.  The traditional layered colors are green, white and pink, which are said to represent the seasons of winter, spring, and summer (no autumn because metaphorically, a girls life should have no autumn).  No, I didn't make that up.  I read that somewhere.  For looks, I prefer pink, white and yellow (as in the pictures).  I don't think blue chichi dango looks very appetizing, so I suppose a green-white-green or white-green-white combination could be done for Boys Day.

The chichi dango in the pics were colored with gel coloring.  Don't be afraid to be bold with the colors, as they will get somewhat washed out in the batter.  If you have made baked layer-type chichi dango before, you were probably instructed to cover the pan tightly with foil when baking each layer.  When I did that the first time, the chichi dango didn't cook properly, so please follow the directions carefully, covering with foil only after pouring the final layer.

Another mistake some people make is to rush the cooling process.  Please don't.  The best rule to follow is to cool the pan overnight.  If cut too early, the chichi dango will be very soft and will have a tendency to weep faster.

teflon knife


The best thing to use to cut the chichi dango is a teflon knife.  The plastic knife from McDonalds will also work.  Sprinkle potato starch as you are working to keep the chichi dango from sticking to itself.

For Girls Day, I gave the nice ladies in the office a little container of chichi dango.  They do so much for us so I wanted to show my appreciation.  I don't think anyone else gave them anything.  Real sad.  Real shame.  The bosses treated the clerical staff in the office to an office professionals day prime rib luncheon buffet, and they did not solicit donations from any of the other drones.  Yay!

Tomorrow marks the beginning of May, and we seem to be hitting the travel season.  D2 leaves tomorrow for a 3-night excursion to Kauai and Oahu with her class (bless you, Mrs. Ferreira, you are the best), and the Rents leave for the far east in a week.  The next "regular" post to this blog will be on May 15.  I am also hitting the road and will be updating as adventures unfold.  Stay tuned. . .   


 click on recipe title for printable recipe
Thick Three Layer Chichi Dango

     2 lbs mochiko
     4 c sugar
     4 c water
     2 cans (13.5 oz each) coconut milk
     food coloring
     potato starch

Preheat oven to 350 degrees.  Grease a 9 x 13" pan.  Combine mochiko, sugar, water, and coconut milk with a whisk.  Remove 4 cups of batter and tint with food coloring (or don't tint if you want an all-white layer).  Bake for 15 minutes.  While first layer is baking, remove 4 cups of batter and set aside.  To remaining batter, add food coloring if desired (or don't add if you want an all-white layer).  Pour over 1st layer and bake 25 minutes.  Add food coloring to batter set aside (or don't add if you want an all-white layer).  Pour over 2nd layer.  Cover pan tightly with foil and bake for 1 hour.  Remove foil immediately.  Cool completely before slicing with plastic or teflon knife.